
This super easy, low-mess and no-sew Unicorn wall hanging DIY craft is so fun for…


How to Make an Upcycled T-shirt Boho Wall Hanging
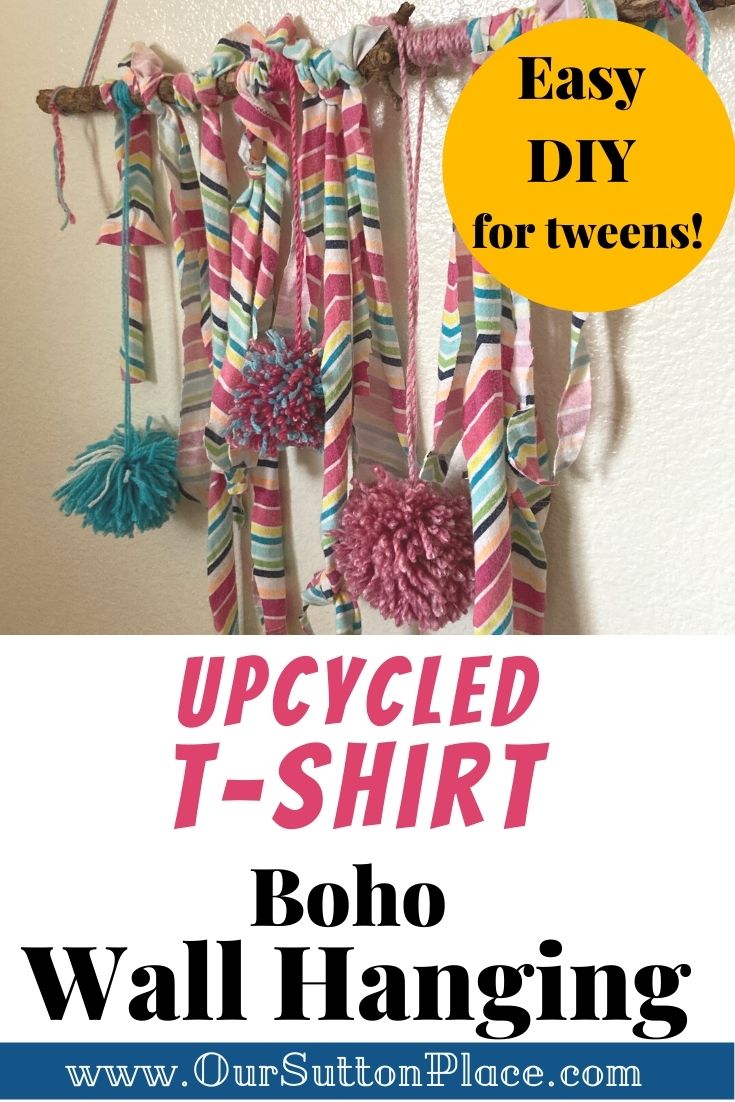
This DIY upcycled t-shirt Boho Wall Hanging is super simple to make and a great craft for tweens. You can use any piece of old clothing. Plus, I’ve also included tips to make pom poms that won’t unravel!
Welcome to this month’s Pinterest Challenge. Every month, I get together with some of my favorite crafty blogger friends and we actually make a craft that we’ve been eyeing on Pinterest.
That’s right—we make something instead of just admiring it online. LOL
To see past Pinterest Challenge topics, click on the months below.
March Challenge: Fairy Gardens.
February Challenge: Spring Wreaths
January Challenge: Valentine’s Day Sweet Treats
This Month’s Challenge Topic
In honor of Earth Day, we’ve chosen upcycled crafts.
I was inspired by this upcycled t-shirt wall hanging pin.
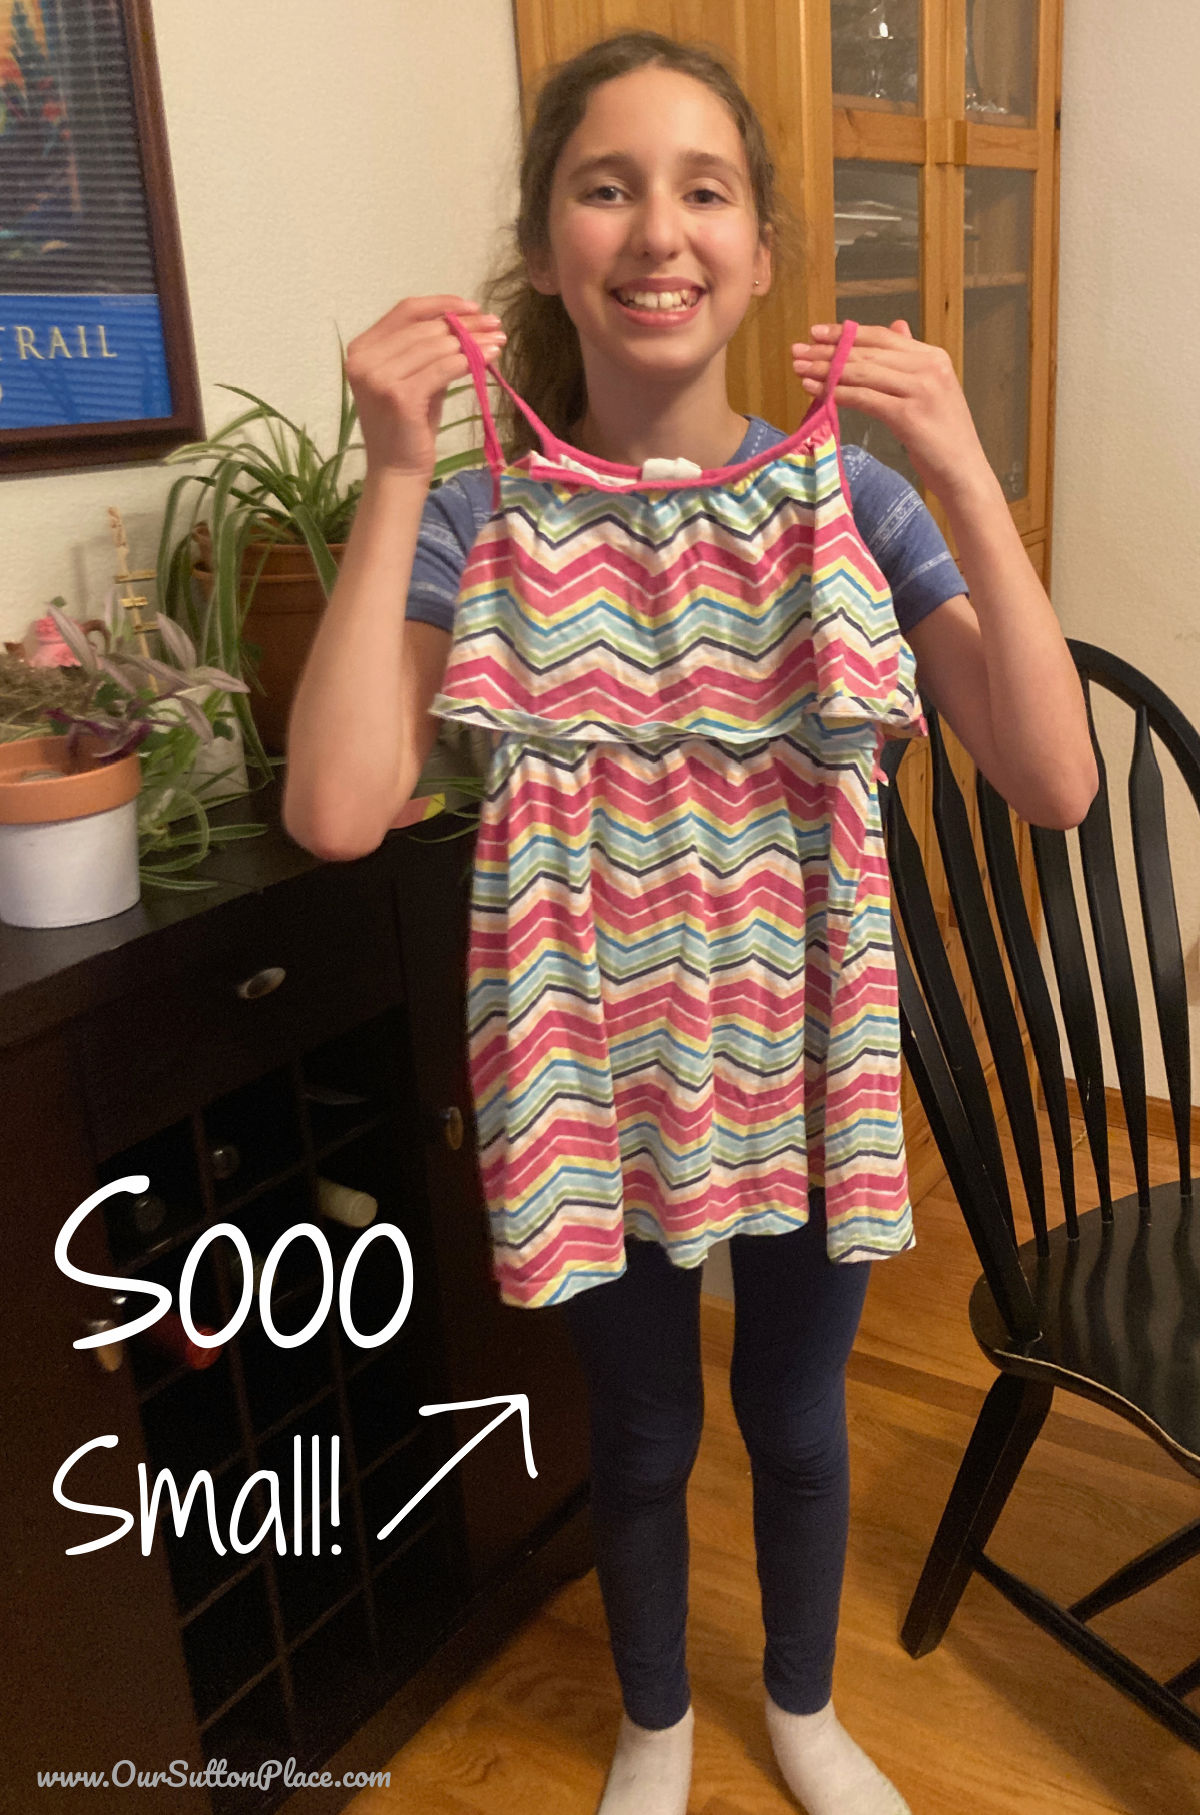
This project came at the perfect time because my 11 year old has been wanting a fun boho Tween Refresh. So I recruited her for this project and she helped me pick out which piece of clothing to upcycle.
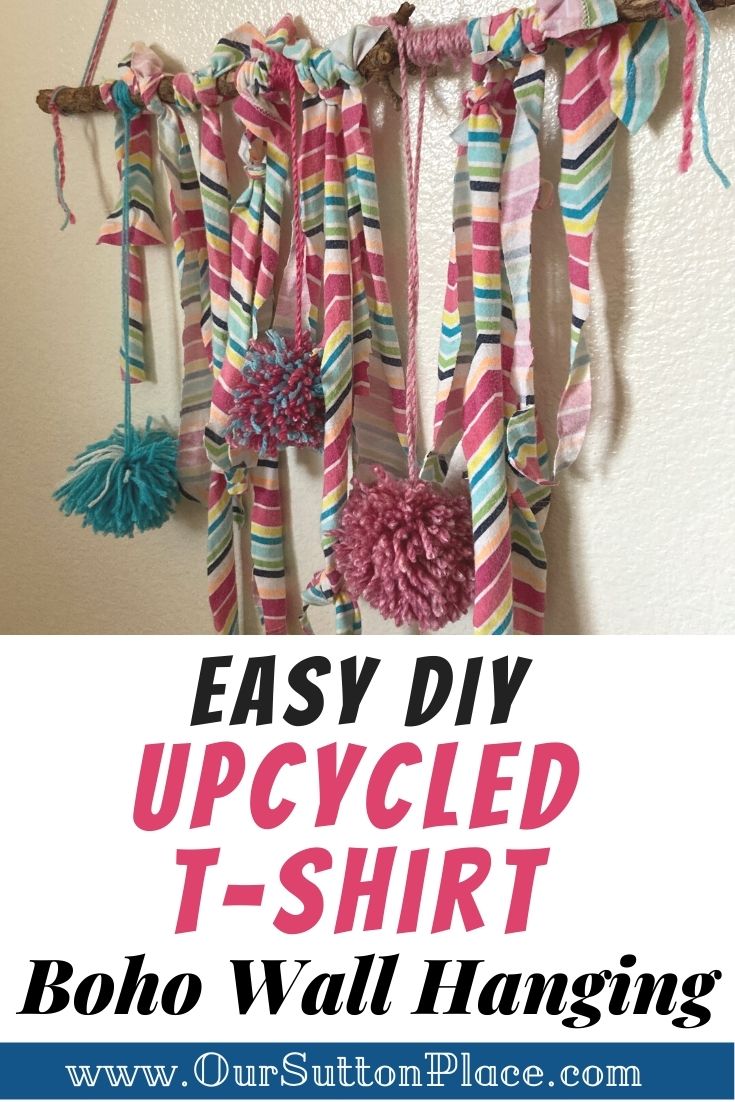
She chose this adorable old dress that as you can tell is waay too small. We both agreed that the colorful pattern would look great as a wall hanging.
Next, I sent her out to the backyard to get some fresh air and find a good branch.
(If you don’t have trees in your yard, you can always get a wooden dowel at the craft store).
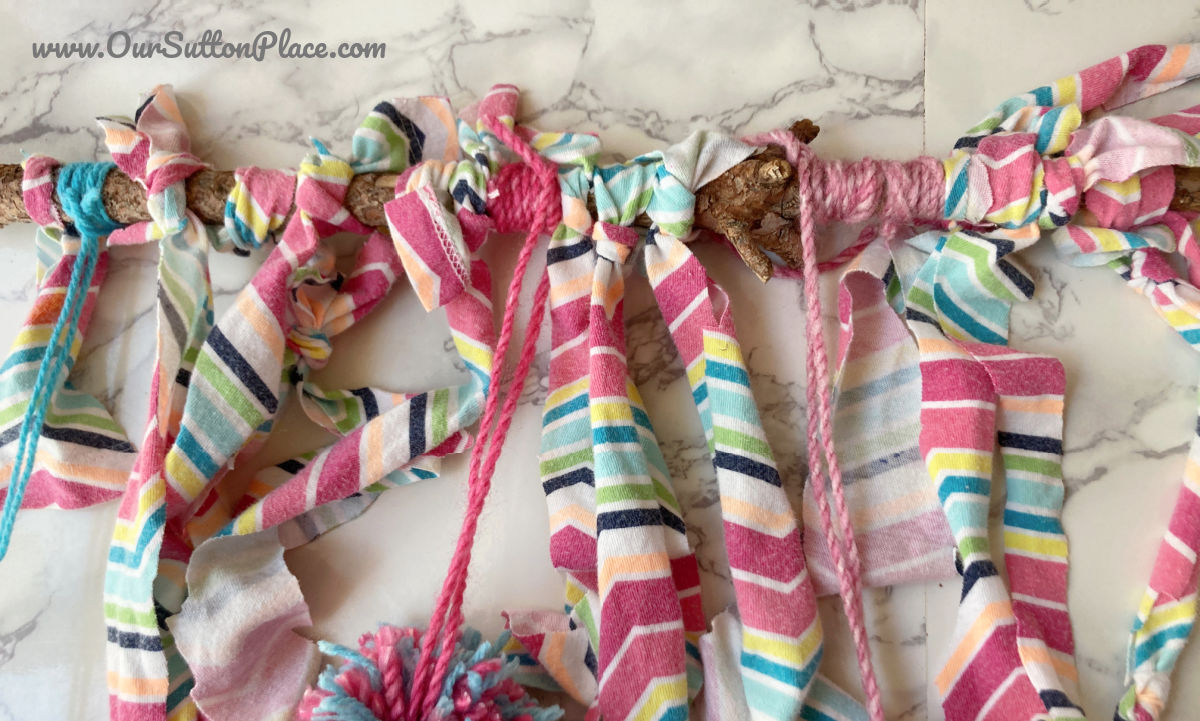
Next, we grabbed a couple pairs of sewing scissors and started cutting rows of fabric. We just cut them about 2 inches apart. We also cut some long and some short so we had a fun variety.
(You could measure them if you want them more uniform, but we were going for a more organic look.)
The key to this step is definitely using really sharp sewing scissors. Regular scissors that are dull will make this step much more difficult.
Once we had a enough to cover most of the branch, we simply tied them.
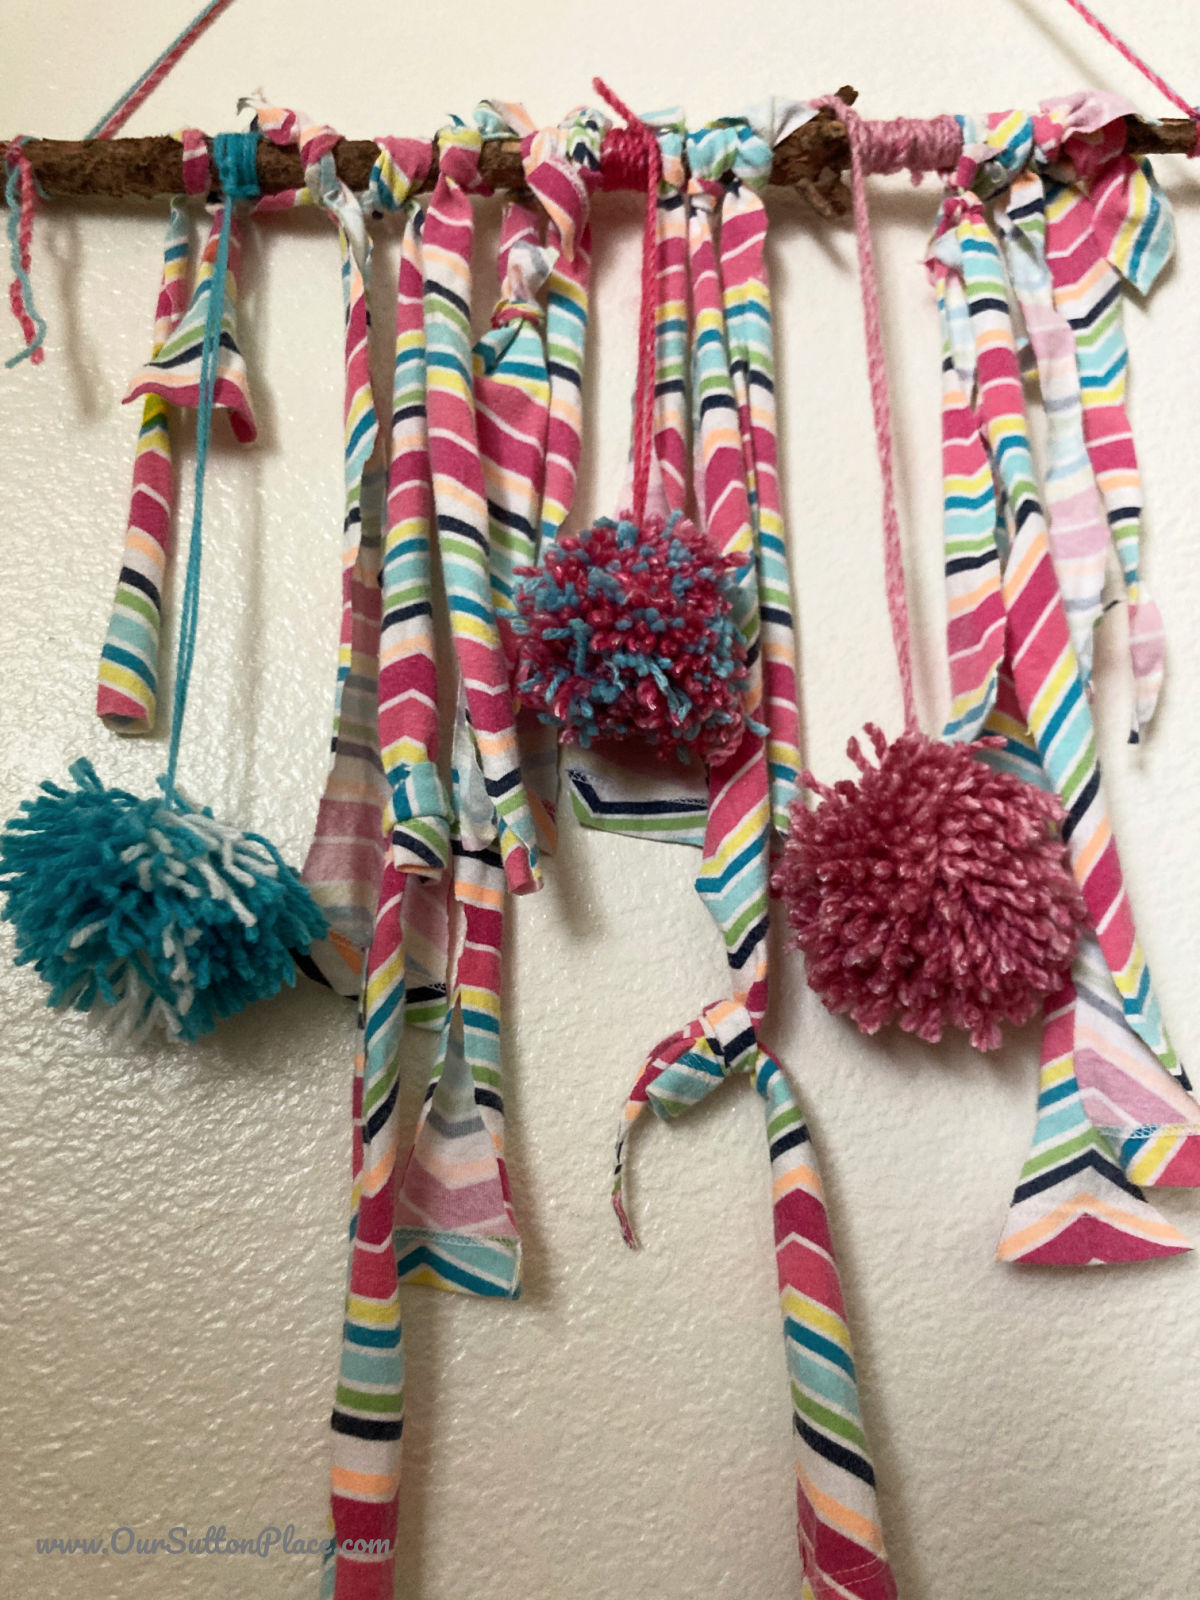
Then we decided to create some homemade pom poms.
I’m not going to lie—this was really frustrating, as they kept unravelling UNTIL we found an amazing video from Robin from RSIsland Crafts.
She explained how you need to DOUBLE TIE the pompoms, MULTIPLE TIMES!
Wow—TOTAL GAME CHANGER!
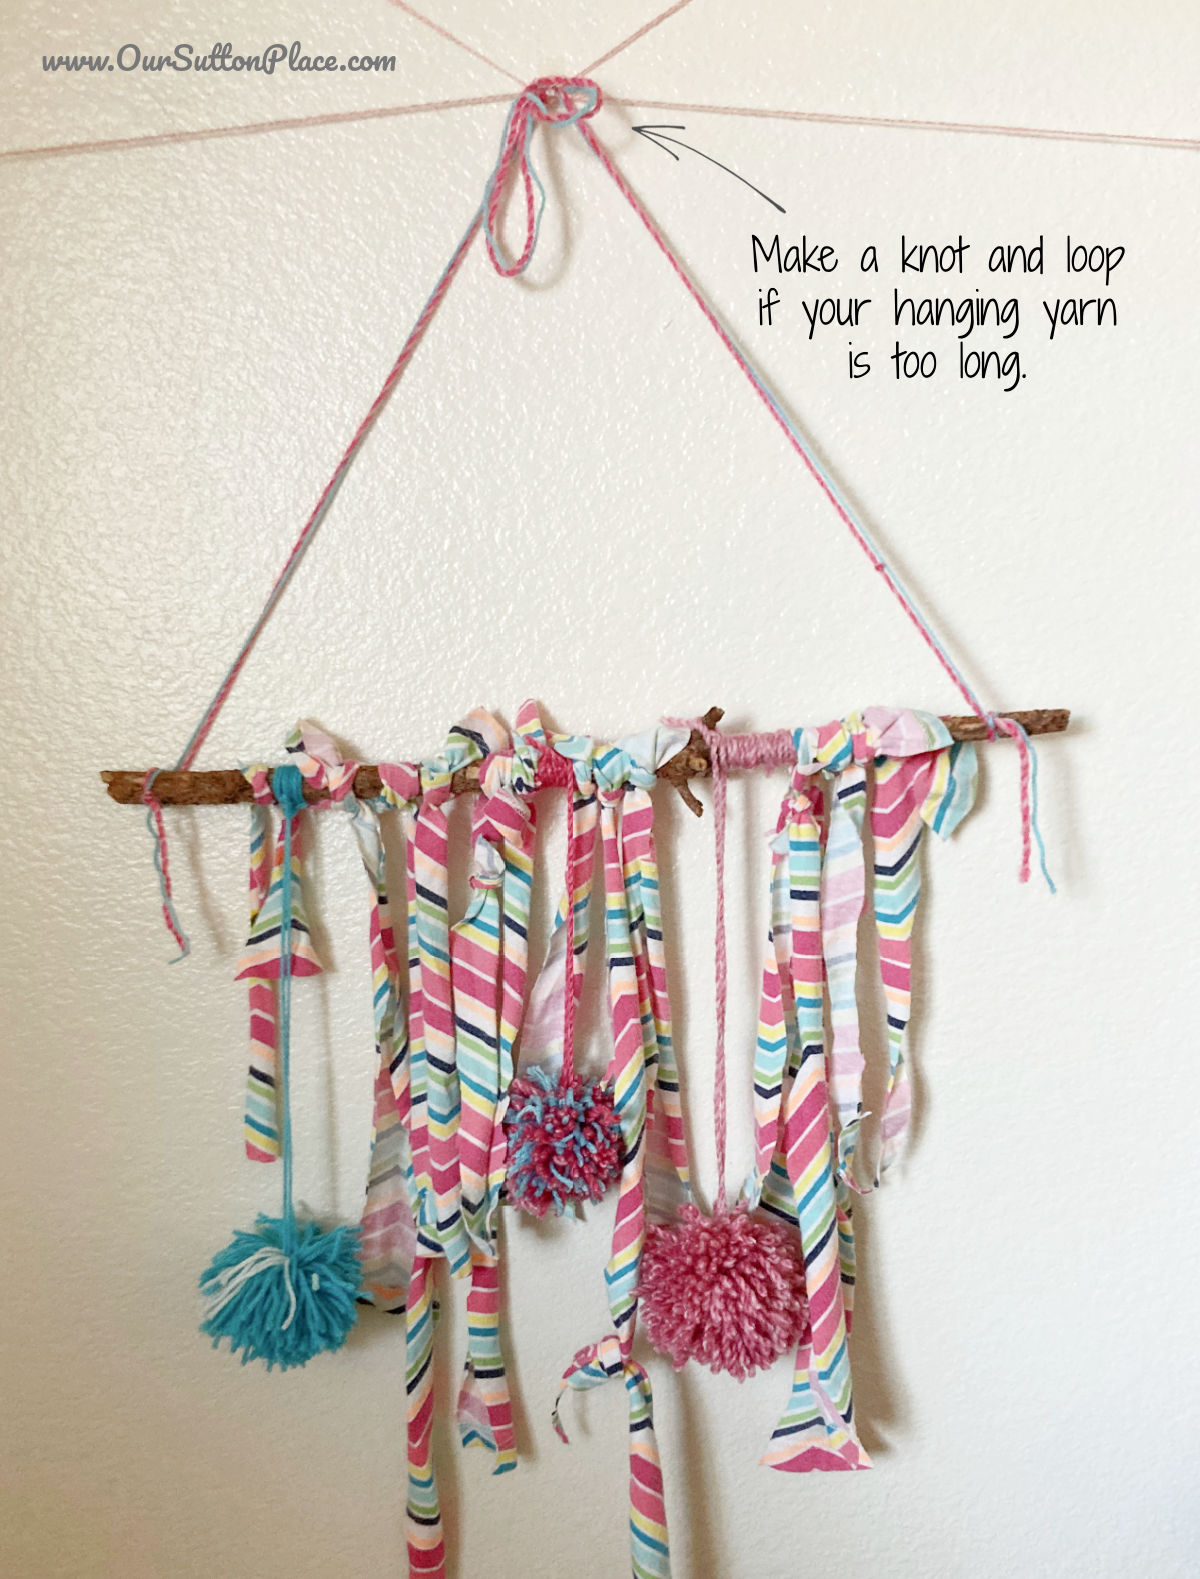
So, then my daughter went to town creating pompoms the whole afternoon, including the 3 you see featured here.
When I tied the pompoms to the branch, I left some extra yarn beyond the knot, so I could wrap it around the branch for an more of a Boho effect.
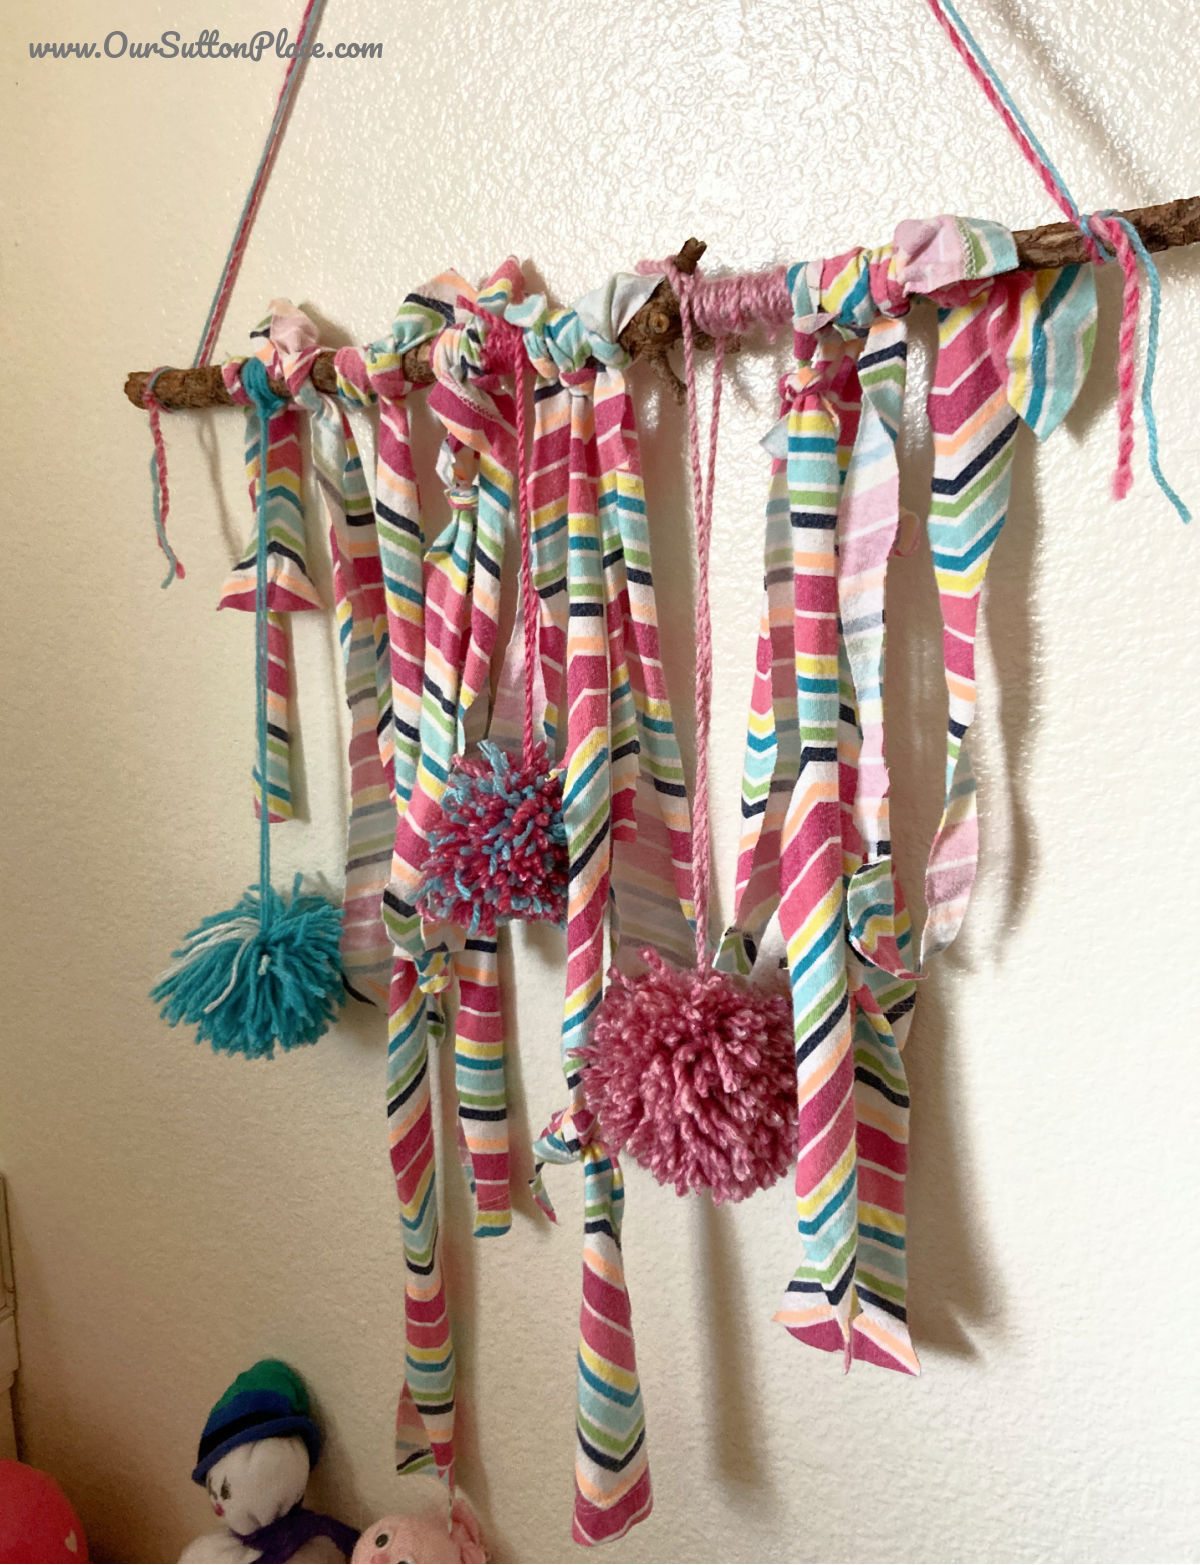
Lastly, grab about 2 feet of yarn and attach them at both ends of the branch. This will be used to hang the art piece on the wall. (If it’s too much yarn, you can knot it at the top as shown below.)
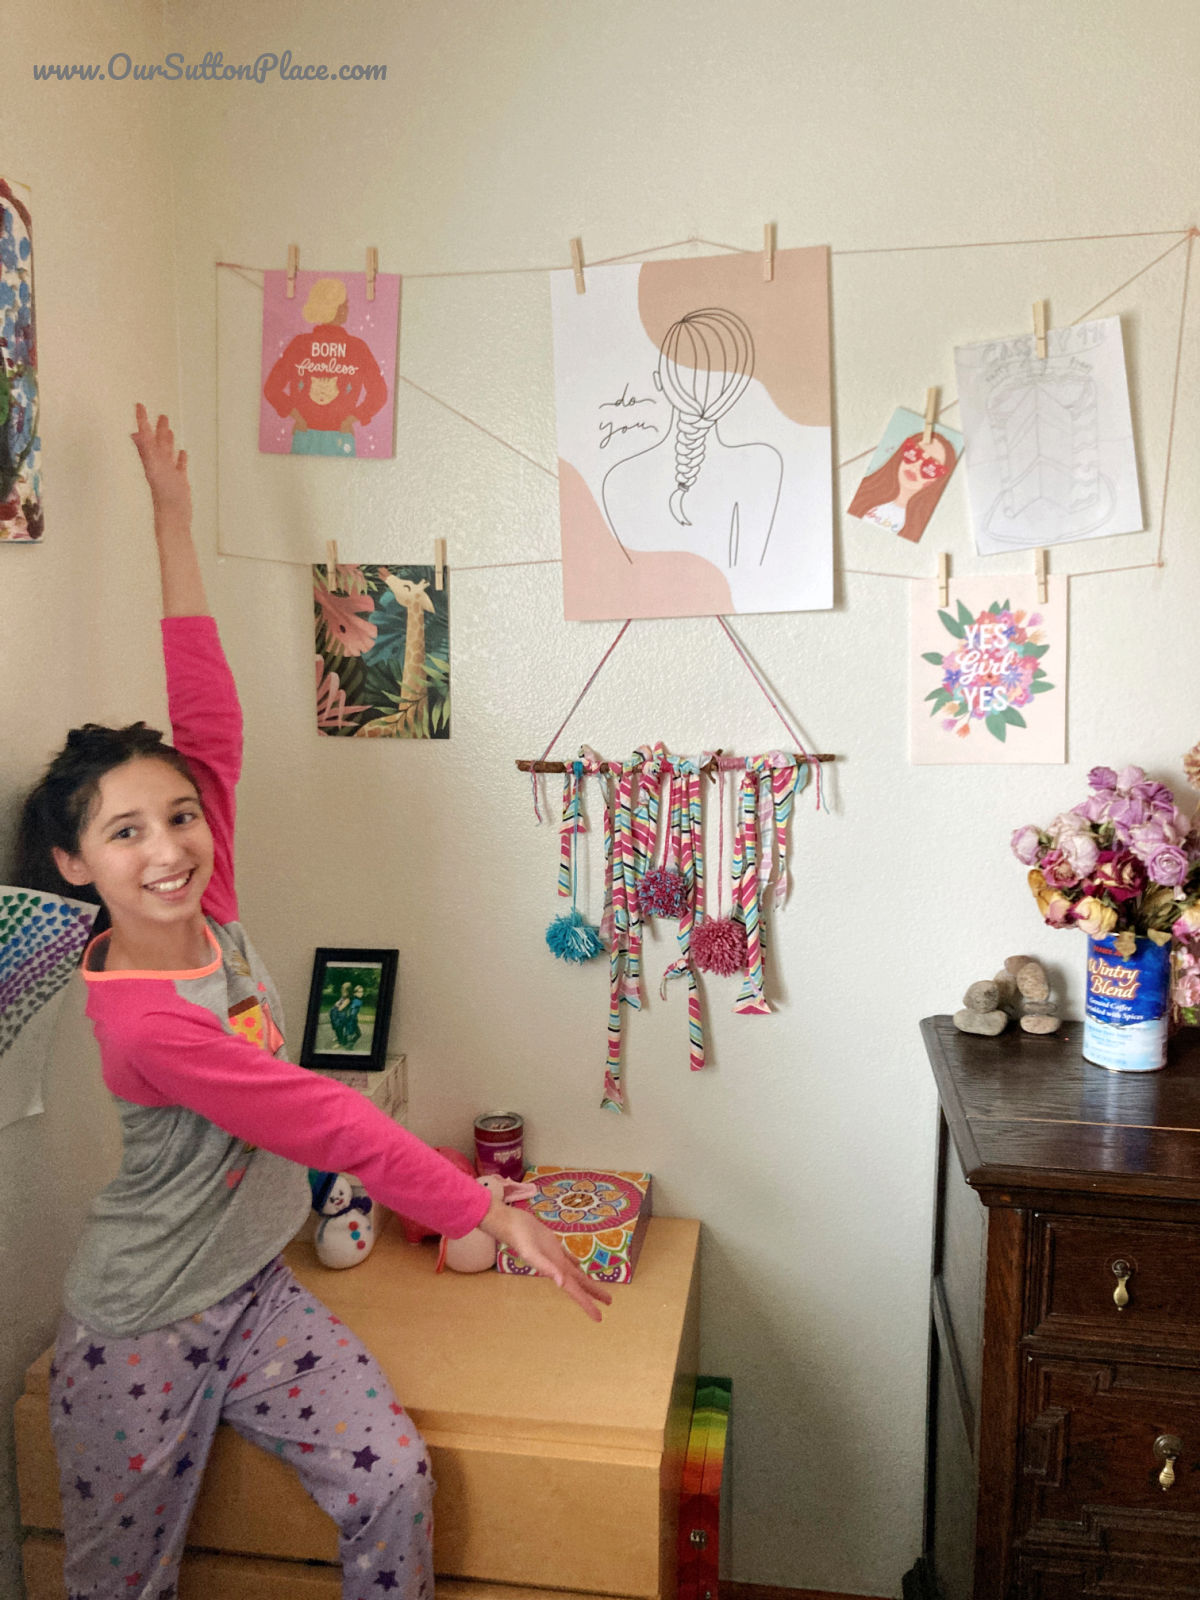
And here’s how it looked in her room.
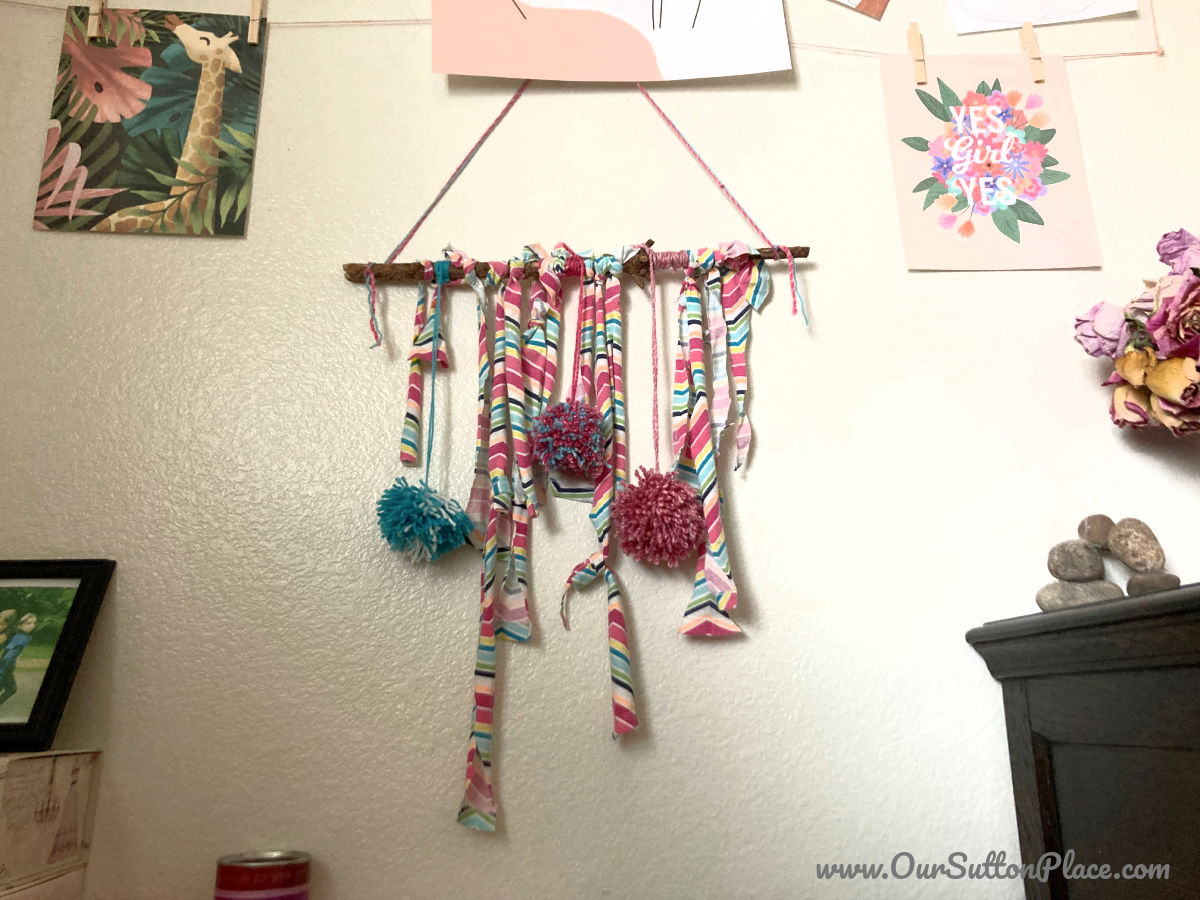
As you can see, she loved it!!
If you enjoyed this article, feel free to leave me a comment below and PLEASE share with your friends. Just tap the social sharing button below. Thanks!
Now, be sure to check out all of the other Upcycled Crafts included below.
And don’t forget to Pin this article to read later.
April Pinterest Challenge
Farm Girl Reformed | Sew Crafty Crochet | Mom Home Guide
Treasures Made from Yarn | Little Vintage Cottage
Southern Sunflowers | Stone Cottage Adventures | EyeLoveKnots
On Rockwood Lane | The Apple Street Cottage | Our Good Life
Pandora’s Box | Our Sutton Place
Tell Your Story-Live Creatively

Sign up for our newsletter and receive the On-The-Road Photography Checklist! Never miss another important photo opportunity again.
HI! I’m a Shana, self-proclaimed Media Mixologist, wife, and mom to two little girls. I love to mix up cocktails of crafts, recipes, wellness, family and business with just the right amount of sparkle to help you shine everyday. So, grab a glass, and let’s celebrate the cocktail of life!
Leave a Reply